Installation of the Volvo SPA SPORT Brake Kit
Here is how to install the SPORT Brake Upgrade Kit for 2019+ Volvo S/V60 models. Other variants will be added for additional models of the SPA chassis and information will be updated to cover any varaiations. This guide was last updated 8/14/22.
Important Notes: It is assumed this kit is installed by an experienced mechanic or vehicle owner familiar with servicing and installing automotive brakes. This guide is specific to installing the brake kit, but other maintenance items you may want or need to do are not covered here. Some steps are identical to OEM brake service procedures, and the latest known information about correct servicing is given. If there are any questions or problems encountered during install contact service@upbrakes.com.
Liability - read before install
Warranty
Money-back guarantee
Tools you will need:
Socket wrenches
Torque Wrench capable of up to 130 ft-lb
18mm socket
8mm socket
7mm socket
T55 Torx
T30 Torx
13mm flare wrench
11mm flare wrench
Hammer
Pressure bleeder and catch bottle or other bleeding tools
Parts you will need:
345mm Volvo Brake Rotors
New fully coated rotors are preferred
PowerStop EBR1642EVC, or Zimmerman 610372620
Depending on your wheels you may need wheel spacers. OEM wheels generally require 10mm or 15mm spacers to clear fixed calipers. Reccomended clearance of wheel spokes to the caliper body is 3mm with a minimum of 2mm. 18" or larger wheels are required.
Optionally you may wish to service the rear brakes at this time. Reccomended to use matching PowerStop Z23 pads.
Included in the kit:
UP Brakes GS4 calipers, fully assembled
UP Brakes Safety Stainless hoses/brackets
UP Brakes SPORT heat shield
UP Brakes steel caliper brackets
UP Brakes Service Card
OEM Volvo Caliper bracket bolts
Caliper Bolts/washers
Caliper hardware
PowerStop Z23 street pads
Powerstop pad grease
Pad pin tool
1. Raise the car and remove the wheels.

2. Remove the bolt holding down the brake hose stay bracket on the upright, and pull the bracket free.

3. Remove the caliper bracket bolts to dismount the caliper and bracket
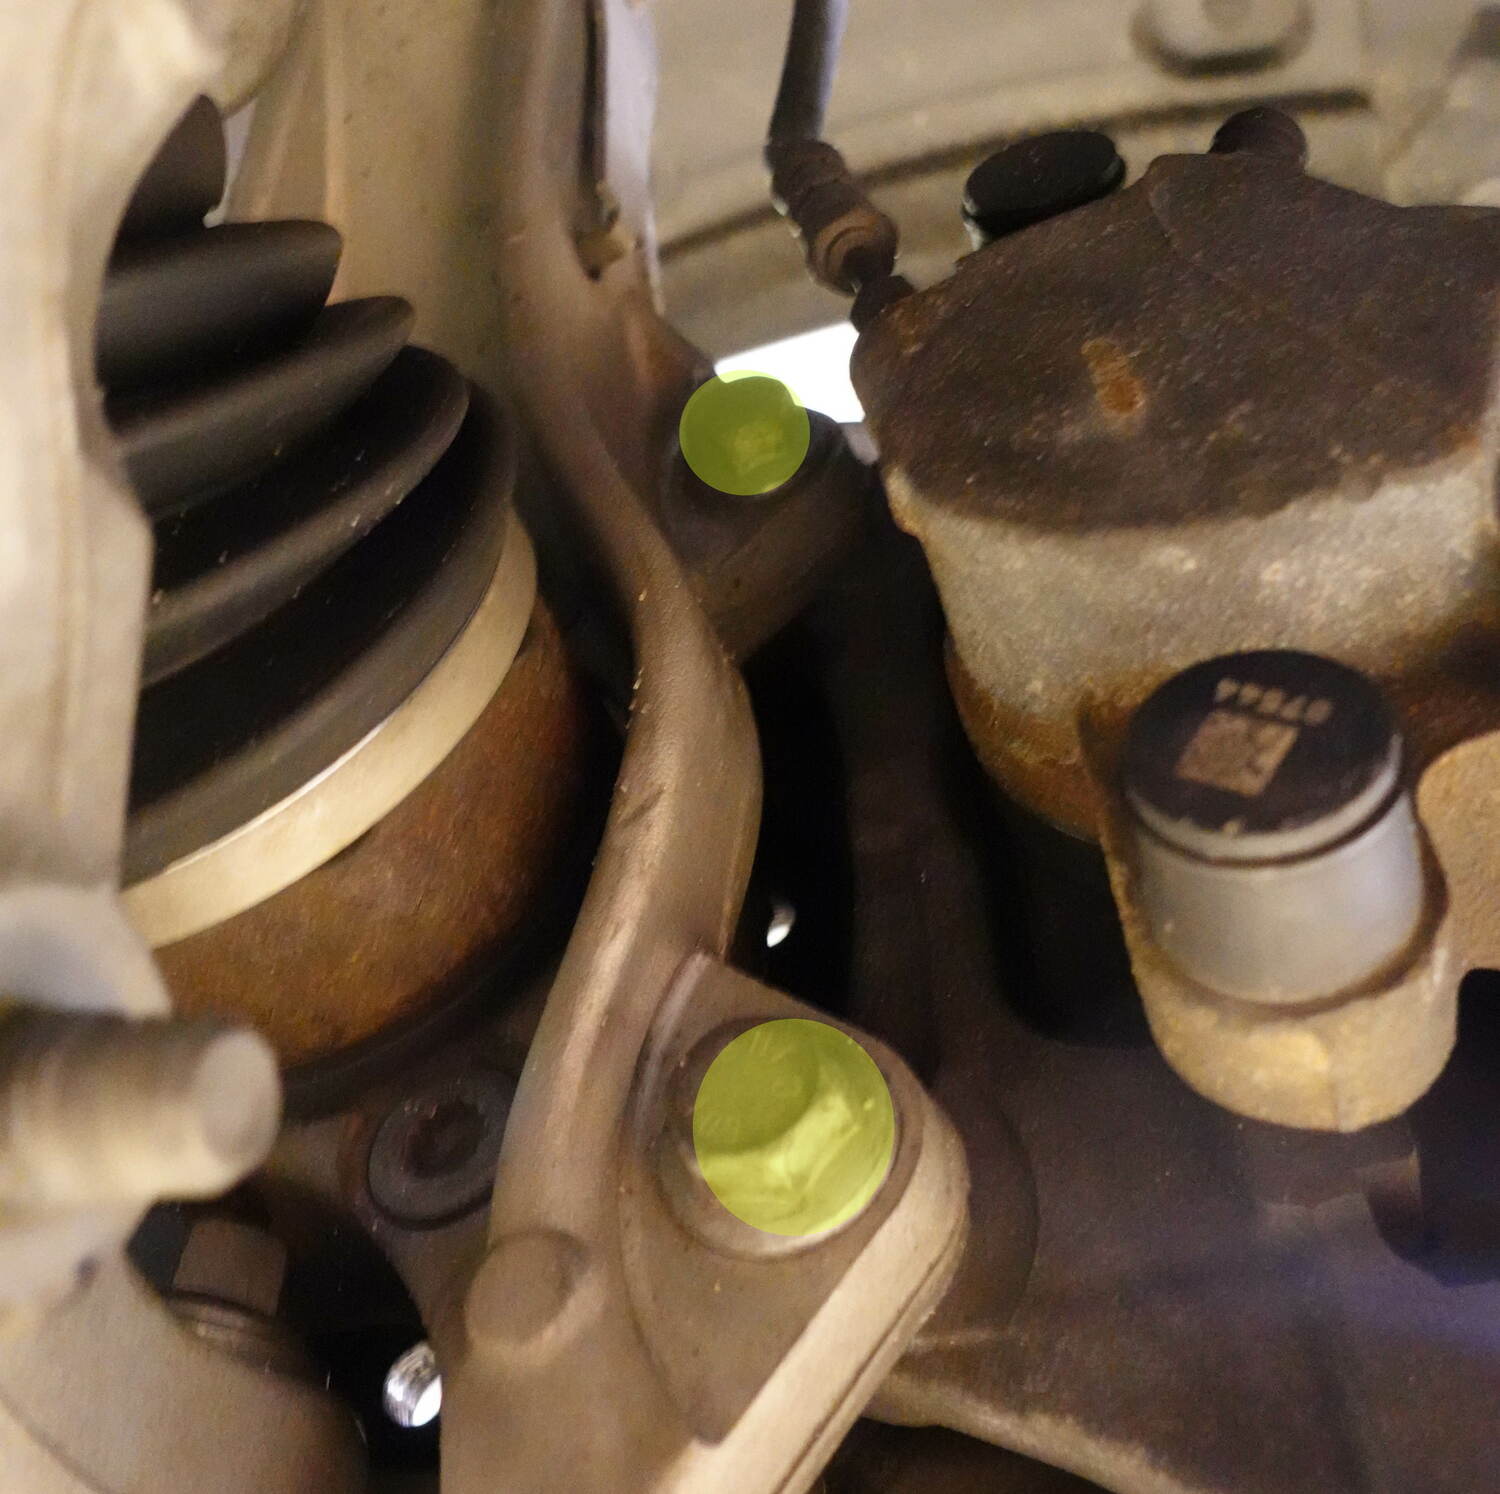
4. Suspend the caliper off to the side, with a hook or strap or other appropriate tool, being careful not to pull or damage the hose still connected to the chassis
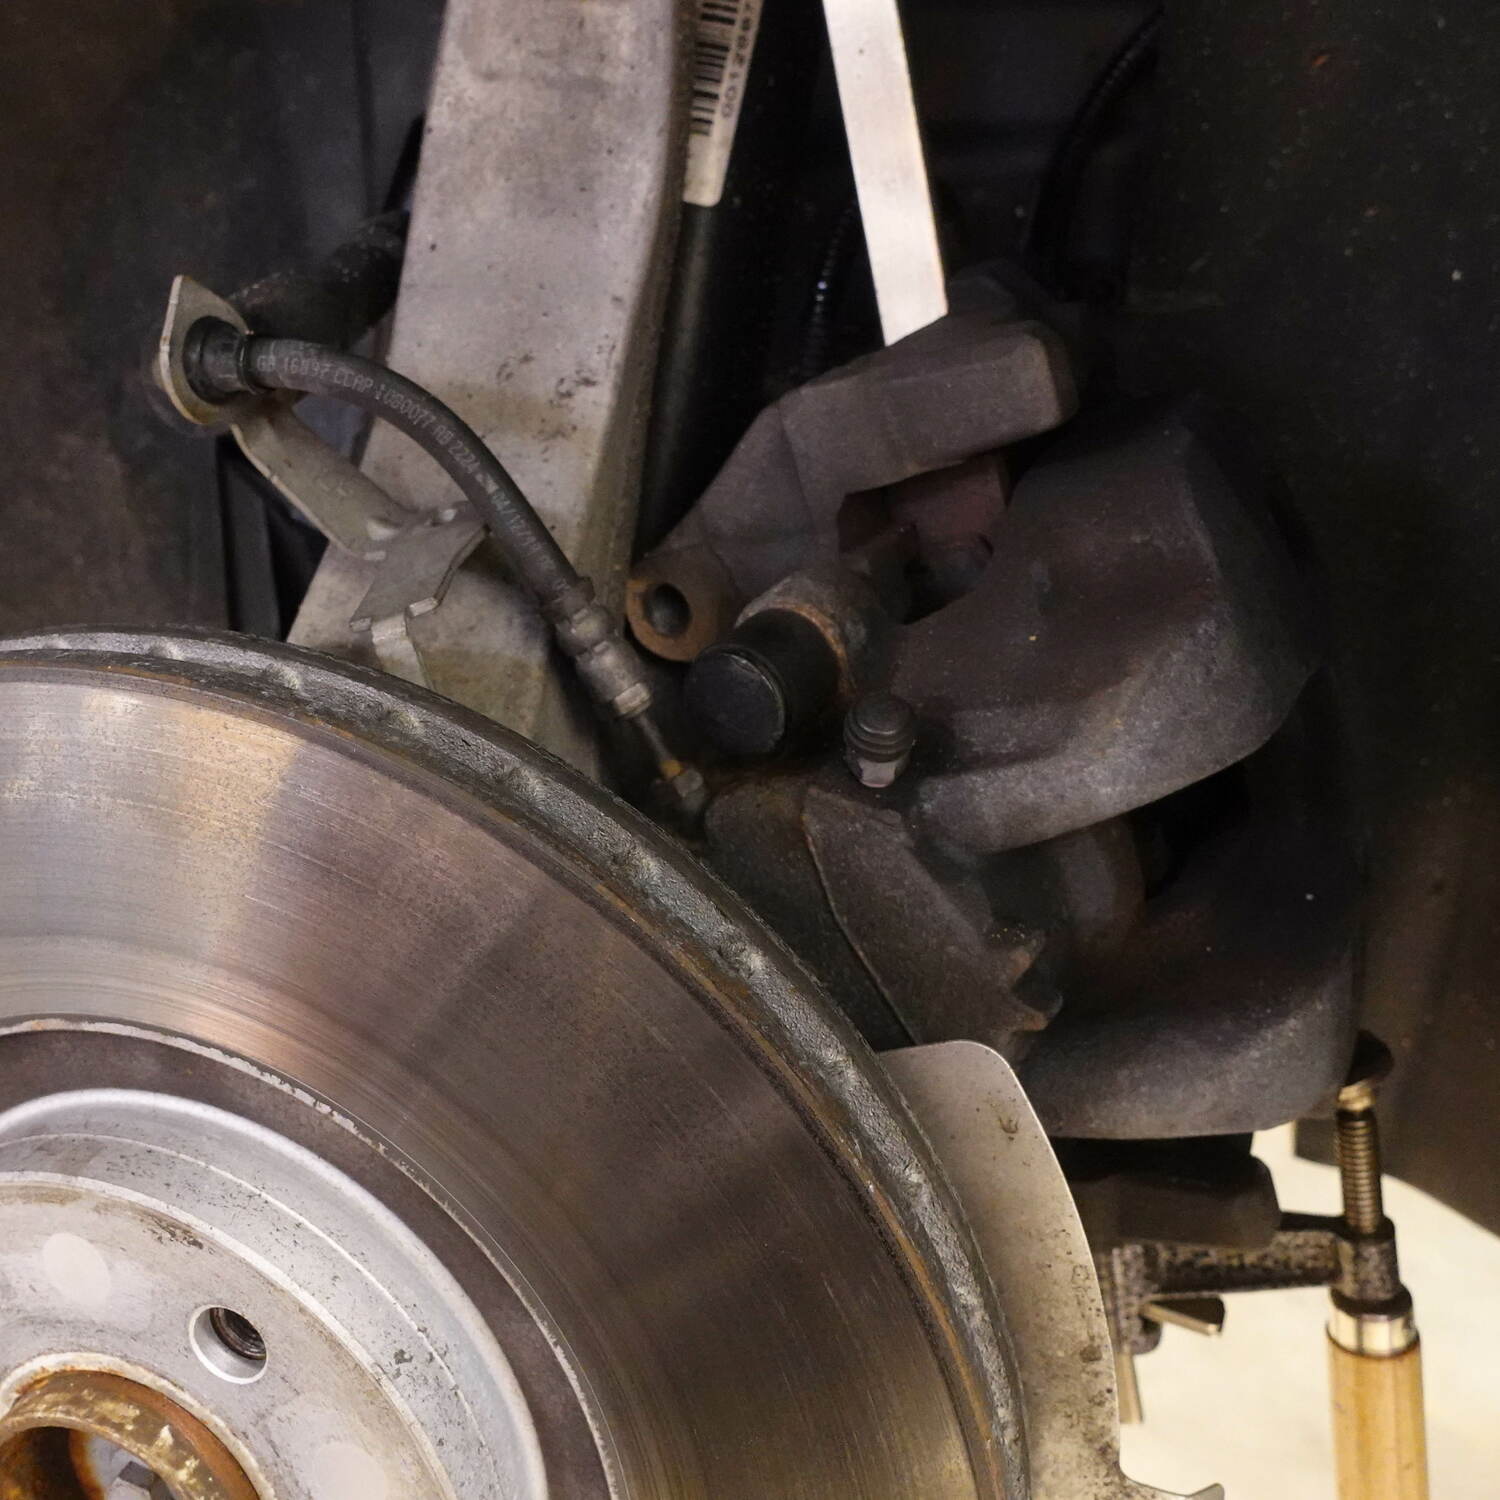
5. Remove the torx bolt holding the rotor to free it from the hub, and remove the rotor.

6. Install the new caliper bracket. Use the new Volvo OEM bolts included with the kit. Tighten to 130 ft-lbs with a torque wrench.

7. Remove the 4 bolts holding the OEM splash shield (not pictured), and remove the shield. Install the new SPORT heat shield re-using 3 OEM splash shield bolts.

8. Install your new 345mm (13.6") Volvo rotor to the hub and secure with the OEM torx bolt.
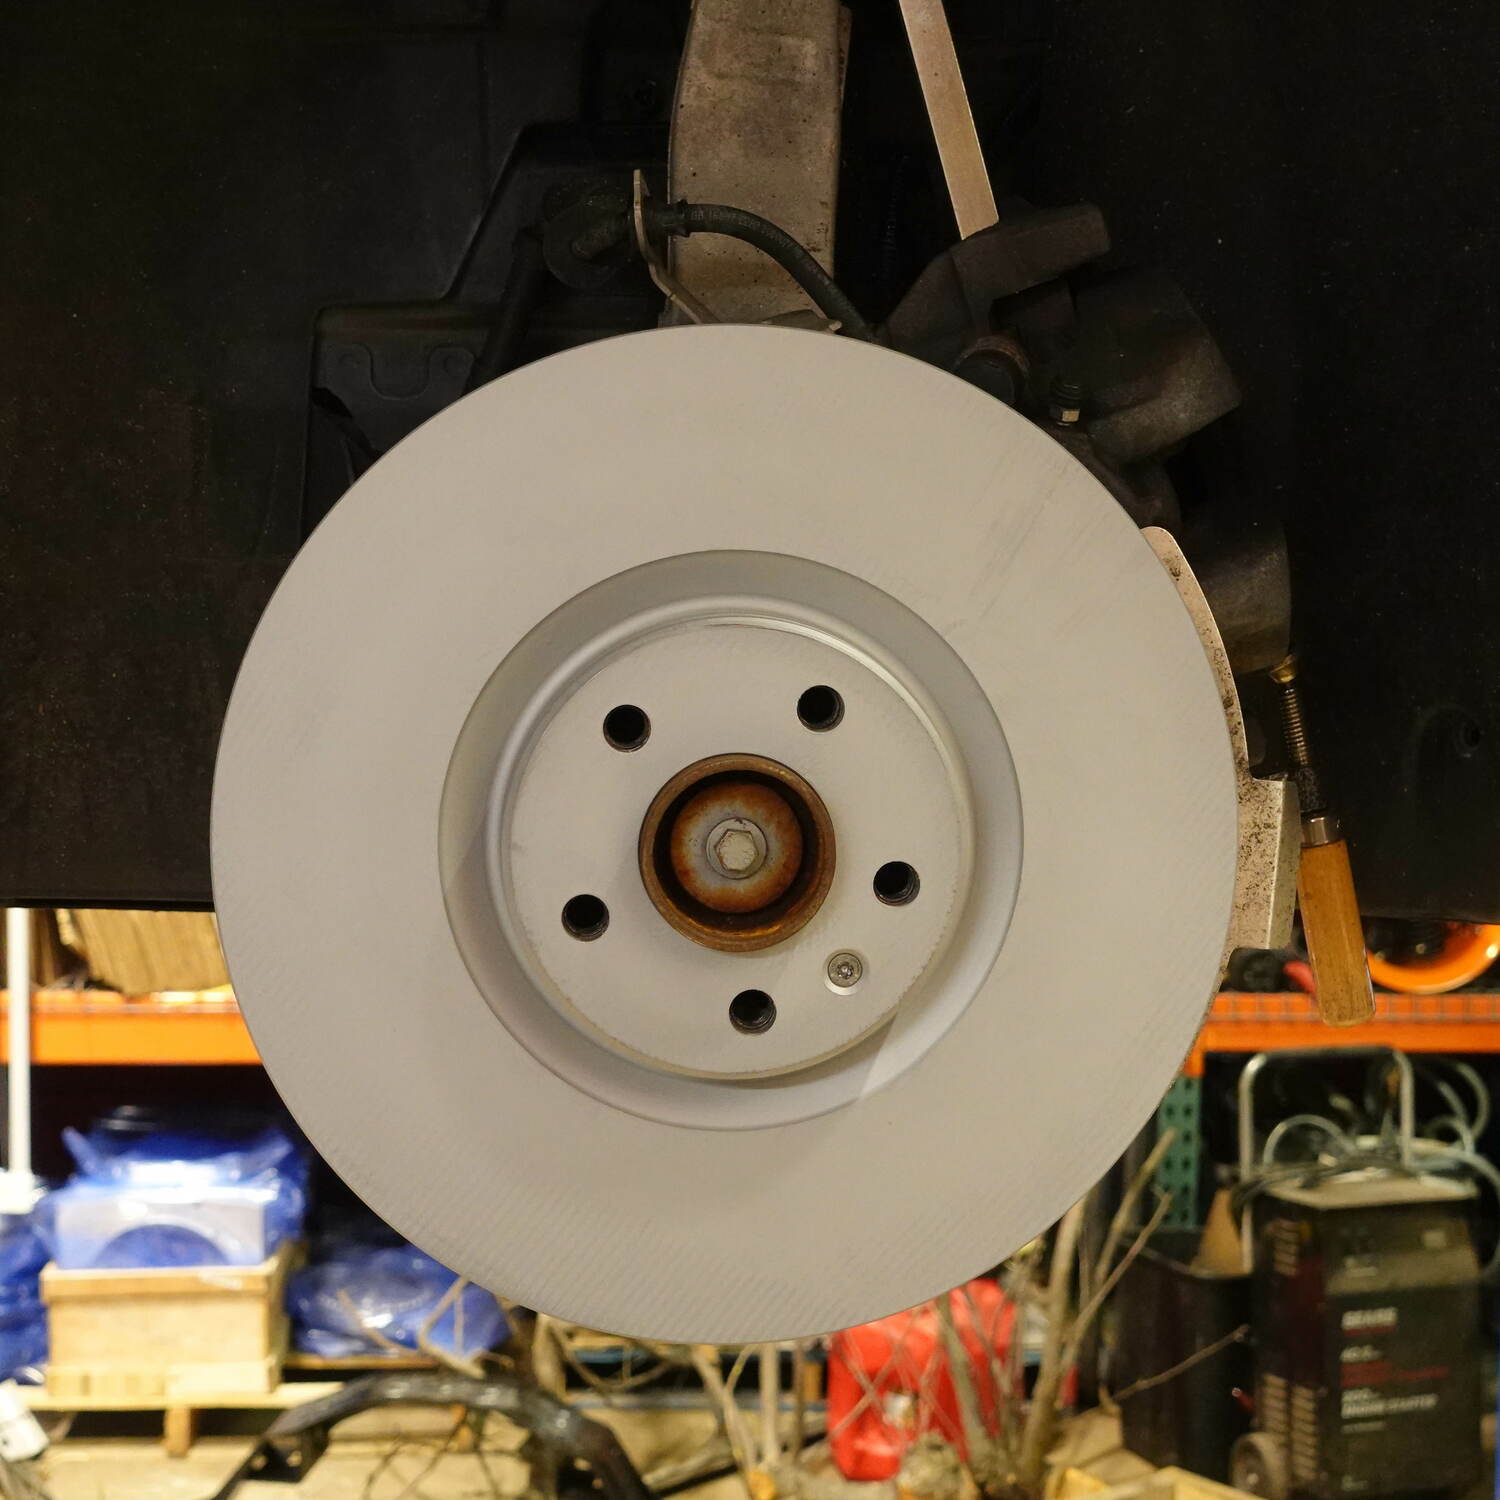
9. Locate the calipers, caliper bolts, and the pads and hardware included with the kit. Install the pad spring to the caliper (reference step 11 to see the pad spring installed).

10. Using the supplied grease, lubricate the pads in all locations as shown, where the pad contacts the guide pins, the sides and the top where the pad contacts the spring.
NOTE: when installing new pads, most pads will have a wear sensor that is not used on Volvos. You should cut the wear sensor wires coming out of the pad material. This may already be done for you in the kit, for future pad replacement pads will usually have the sensor wires attached which can be removed.

11. Install the pads into the caliper, install the guide pins to secure the pads, lightly tap the pins with the included pad pin tool and a hammer to secure them.

12. Install the caliper to the bracket on the car, torque the caiper bolts to 80 ft-lbs. Make sure the included washer is present. Install the bolts dry, they are treated with a re-usable thread locker.

13. Check for any apparent fit issues with the caliper and rotor.

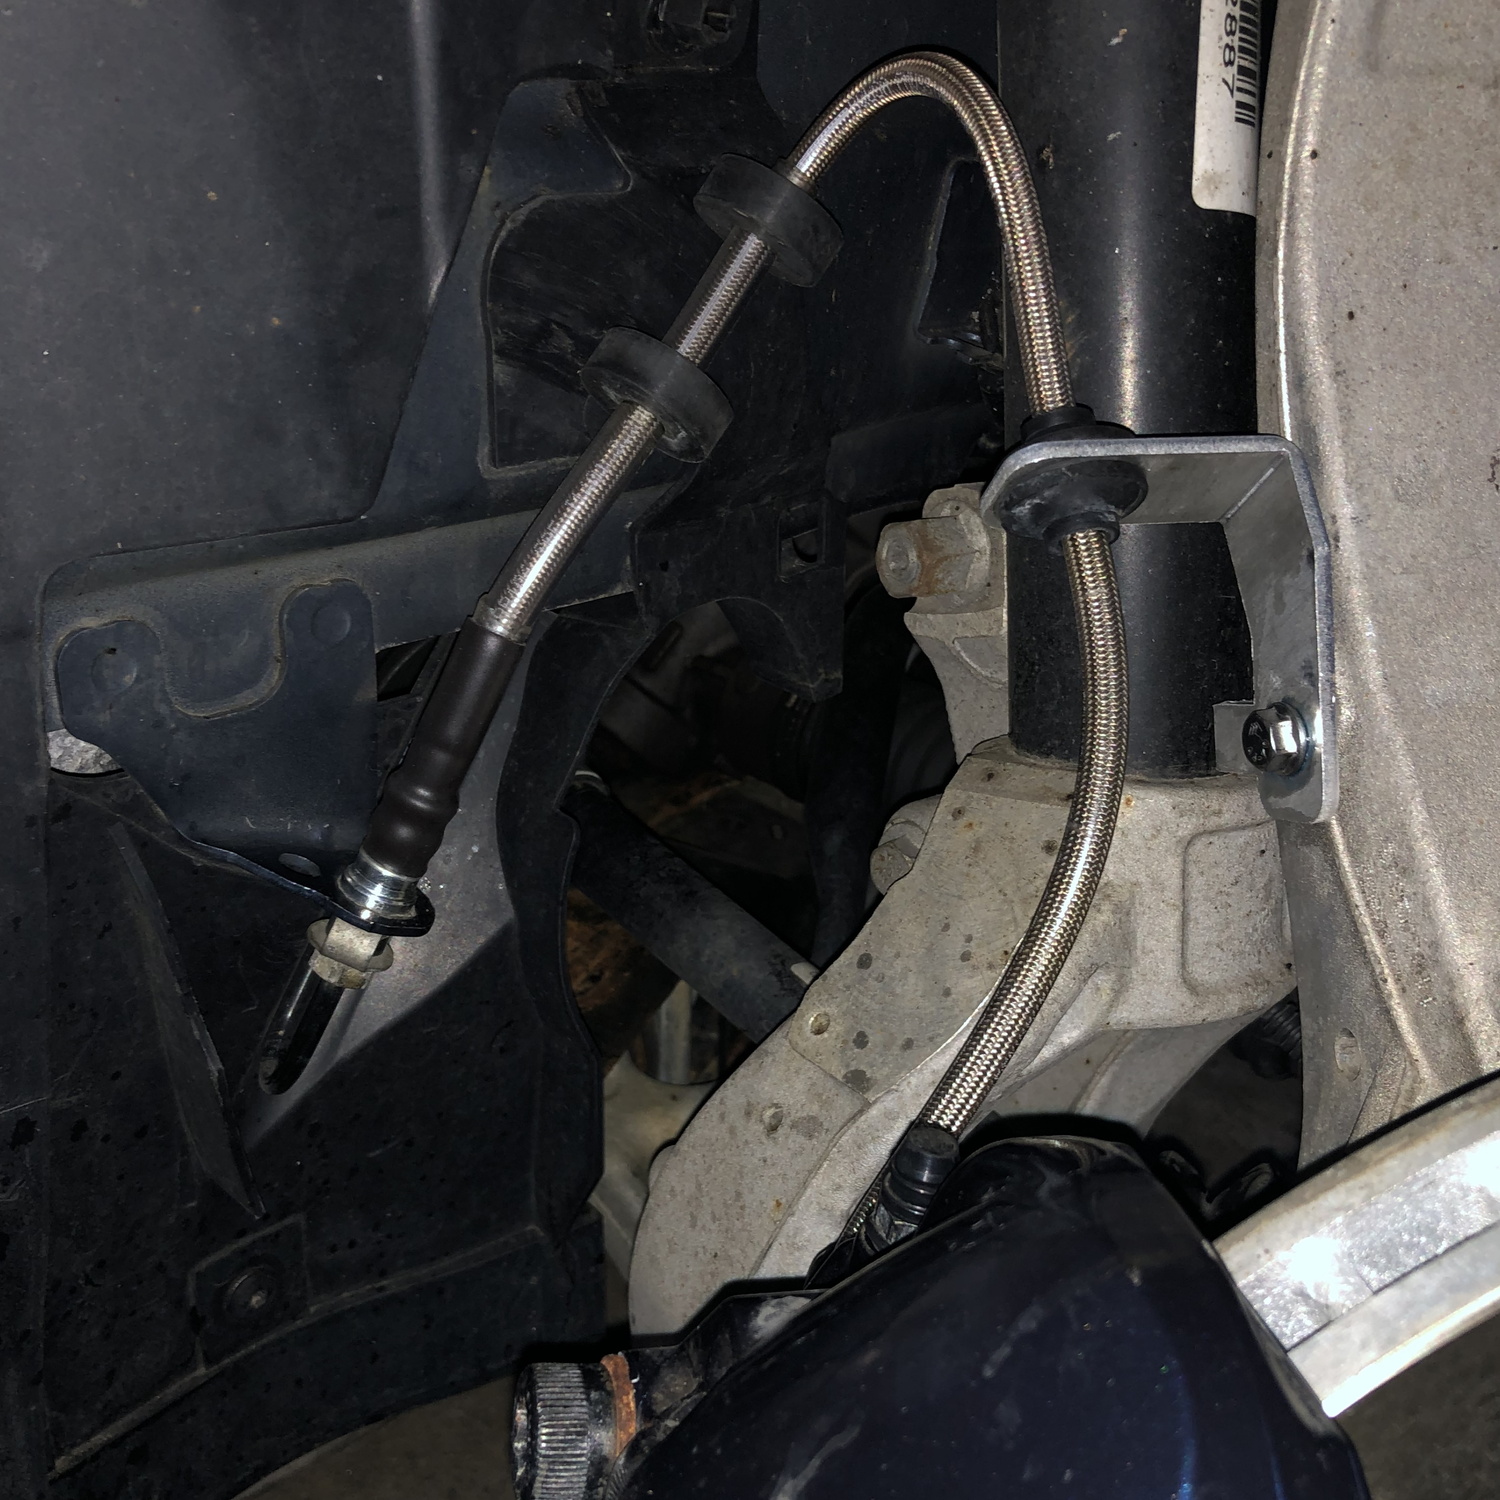
14. Locate the brake hoses and the appropriate hose for the left or right side. Use the picture as a guide, note the brackets will only fit the proper side of the car. Secure the hose first via the bracket to the upright, re-using the OEM bracket bolt.
*NOTE* It is reccomended to use a low-medium strength thread locker on the hose bracket bolt, to prevent seizing due to corrosion between the steel bolt and alloy suspension upright. Loctite purple or blue is OK here. Alteranatively a small amount of anti-seize should do if threadlocker is not available.

The hose bracket can be adjusted in position via the allowances of the slotted mounting hole and the locating tab, to account for variations in the suspension upright. This may be neccessary if any clearance issues need to be addressed with aftermarket wheels. The tab can optionally be bent slightly to set the location where you like, not required but can speed removal and assembly later.

15. Now attach the caliper end of the hose. If it is not aligned you can rotate the hose in the bracket to align the 90 deg fitting with the caliper. Reference torque is 13 ft-lbs, use a flare wrench, do not use a torque wrench, the torque spec is a guide for proper tightness.

16. SET THE STEERING IN THE STRAIGHT AHEAD POSITION. You don't have to be precise, the steering just needs to be approximtely in the center for the next step.

17. Remove the OEM brake hose from the chassis connection, and pull the hose out of the chassis tab. Use a flare wrench. Move quickly to the next step to minimize brake fluid loss. You may want to put down cloth or other absorbent or a drain pan to catch brake fluid drips.
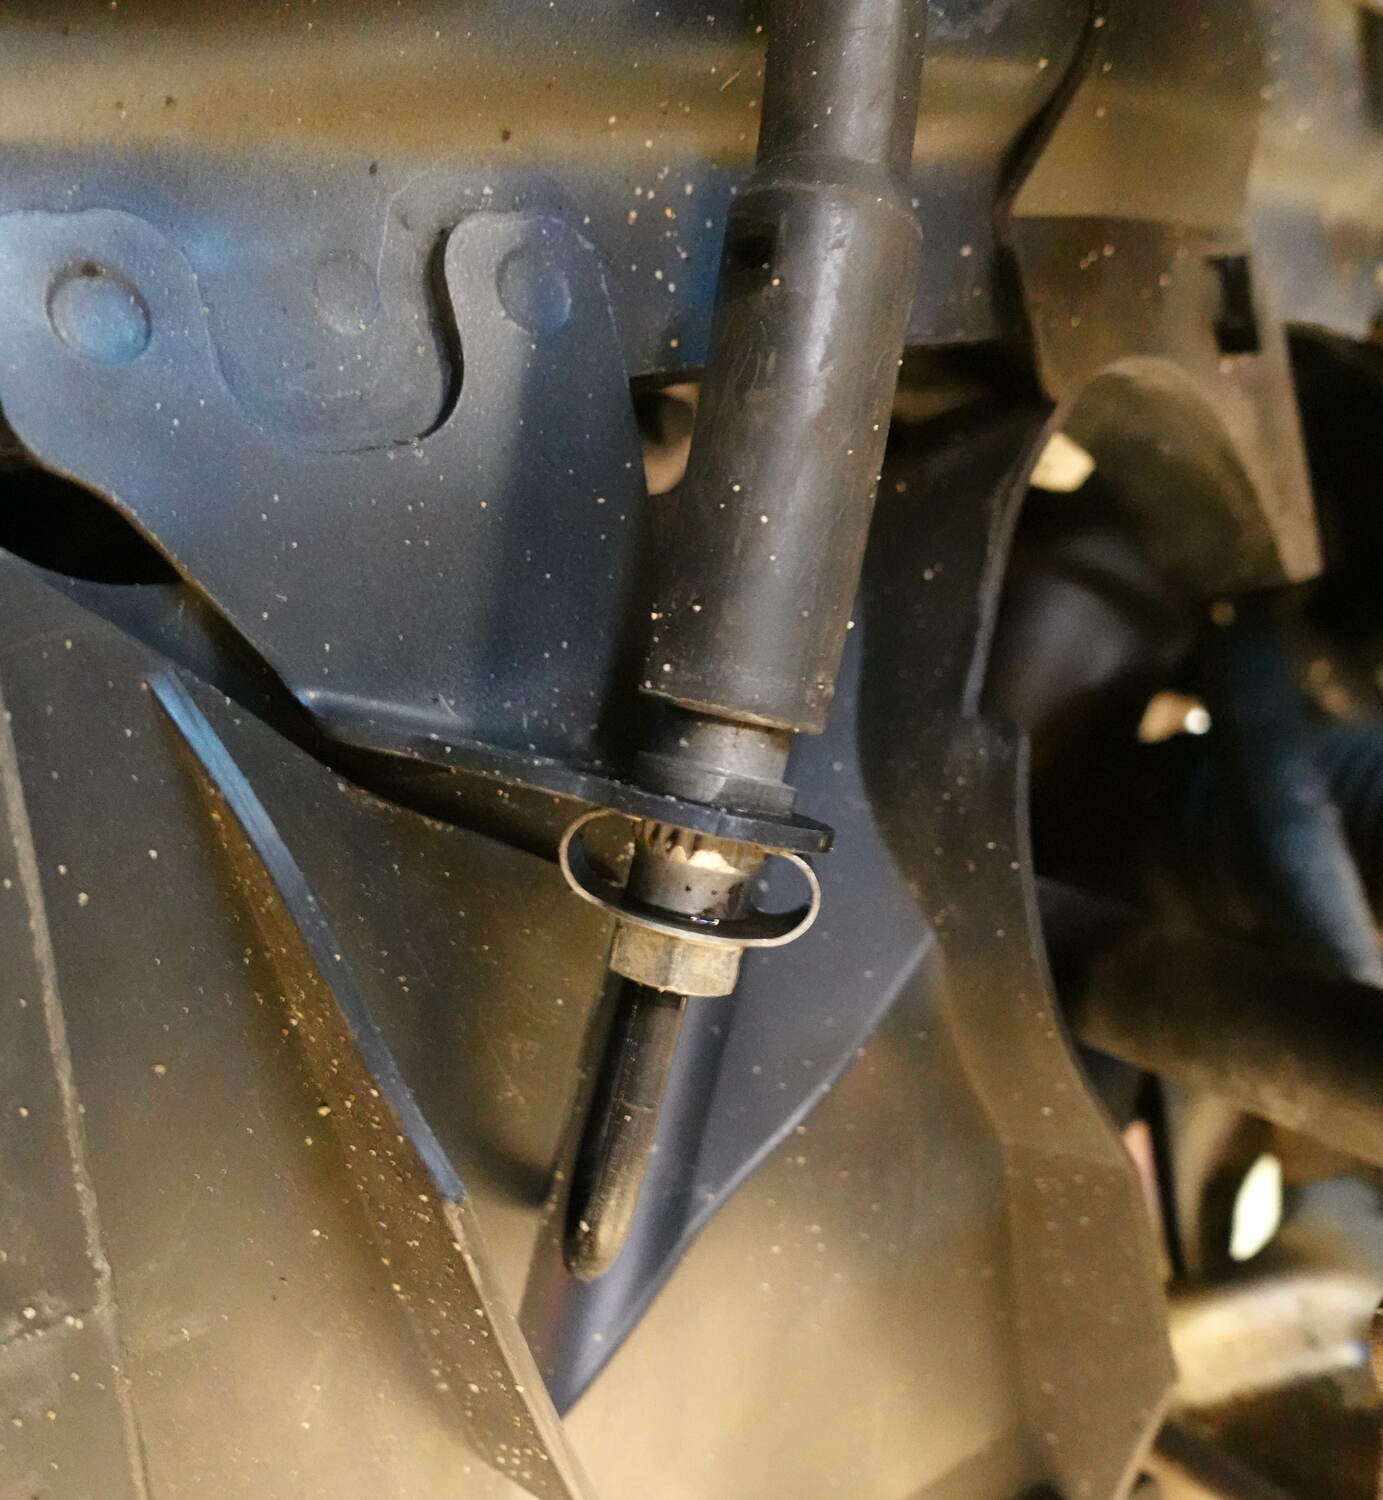
18. Insert the new brake hose chassis connection in the tab and connect the chassis line. The hose fitting should be inserted to enage the splines in the chassis tab while attached to the bracket and caliper and with the wheels straight ahead. This will ensure the hose is not twisted and retains the safety of relieving stress on the threaded fitting in use. Tighten the chassis line with a 13mm flare wrench to about 13 ft-lbs. Do not use a torque wrench, the spec is for reference only.
Now is a good time to clean residual brake fluid from the wheel area with brake parts cleaner, to prevent damage to painted surfaces.

Perform a "sweep" of the steering: check hose routing at full steering lock, both left and right. The hose should not contact the shock body, and it should clear the adjuster mechanism on models with adjustable "4C" shocks. The rubber bumpers should keep the hose from contacting the chassis.
19. Repeat the process of install on the opposite side of the car. The passenger side brake hose chassis connection is covered by plastic panels. To access the tab and fitting, start by removing the 2 torx bolts pictured.

20. Remove the plastic nut pictured. Pull the wheel well trims back and off the stud to release the panel covering the chassis tab.

21. The panel can be moved down without removing it, in order to access the chassis tab and fitting.

21. When the caliper and rotor install is complete on both front corners, bleed the brake system. It is reccomended to follow the Volvo service procedure for bleeding the brake system. Volvo specifices bleeding all 4 wheel locations with pressure bleeding equipment at 30psi, bleeding the RR(right-rear) then LR, RF, LF in order. There is no special procedure needed for the ABS system*. You can substitute a manual pressure bleeding system such as shown here. This is reccomended, there are other methods to bleed brake systems that may or may not produce the same results. Never let the brake fluid reservior run dry. Volvo specifies DOT 5.1 brake fluid. We reccomend ATE Super Dot 5.1 type fluid.
(*)Hybrid B5 and B6 models, and T8 PHEV (generally 2019+ T8) with "brake by wire" system have a special service procedure for bleeding.

22. The UP fixed calipers have 2 bleeders. When bleeding the caliper, perform the bleeding on the inside bleeder first, as shown with "1" in the picture. Then bleed the outside bleeder ("2") last. Install the wheels and lower the car to complete the instal
Other general bleeding tips:
Perform a thorough bleed with plenty of fluid. You may consider this a flush if your brake fluid has not been replaced recently.
A rubber mallet is helpful to tap calipers to release any air bubbles stuck by surface tension inside.
You can alternate inside and outside bleeders on the calipers when doing a thorough bleeding, always finish with the outside bleeder.
Despite your best efforts you may not work all possible air out of the system at install. Consider a follow up bleed after install and some time driving with the new brakes, if you feel it might be needed.

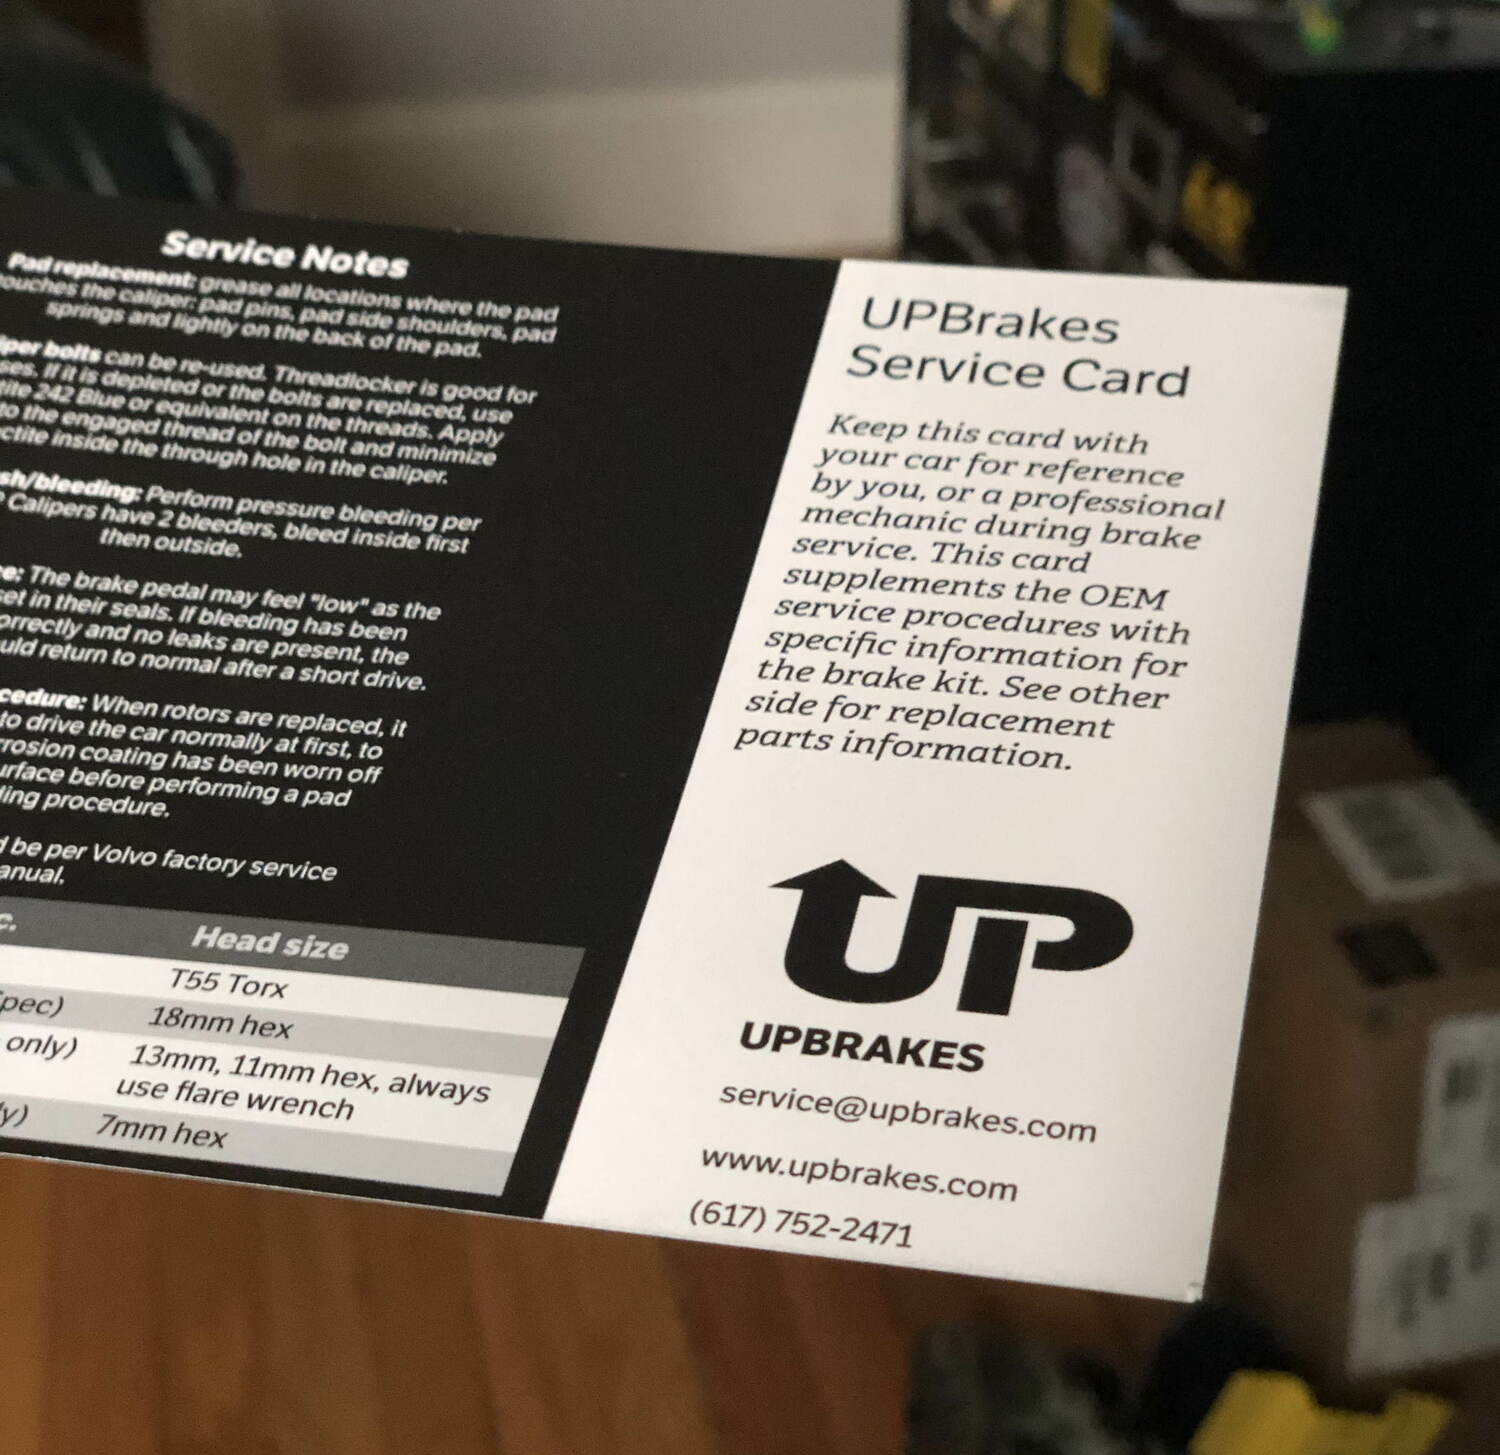
23. Place the included Service Card in the glovebox or with the owner's manual. Keep this card in the car for your own reference or reference by a mechanic or dealer in the future. The card contains spare parts information and applications to source all service parts for brake jobs and complete caliper service, as well as specific information for servicing this brake kit to supplement the factory procedures.
NOTES ON YOUR NEW BRAKES, READ BEFORE YOU DRIVE!
1.) Make sure the brake fluid reservioir is full after bleeding.
2.) Pump the pedal with the car off to take up the initial slack in the replaced calipers
3.) Press and hold the brake pedal with significant force for a few minutes with the engine off
4.) Inspect the brakes and wheel areas for any signs of leaks. If you see any leaks, this needs to be resolved before you drive the car
5.) If no leaks are found you can now test drive the car, always be cautious at first after any fresh brake service
6.) Drive gently at first, to get used to the new brakes, feel for any problems and also to wear off the protective coating on the friction surface of the rotors
7.) If the pedal feels "long" or "low" at this time, do not panic. It will take a little driving and use for the pistons to set in their seals.
8.) If a "low" feeling of the brake pedal persists, re-bleed the brakes after some driving time.
9.) Check the wheel areas for any leaks or drips of brake fluid after a drive. If found these must be addressed before continuing to drive the car
10.) Once you have driven the car, are comfortable with the brakes and the friction surface has been worn clean of coating you can perform a brake pad bedding process. Follow the procedure per PowerStop: https://www.powerstop.com/brake-pad-break-in-procedure/
For help with any issues contact service@upbrakes.com.